
Contents
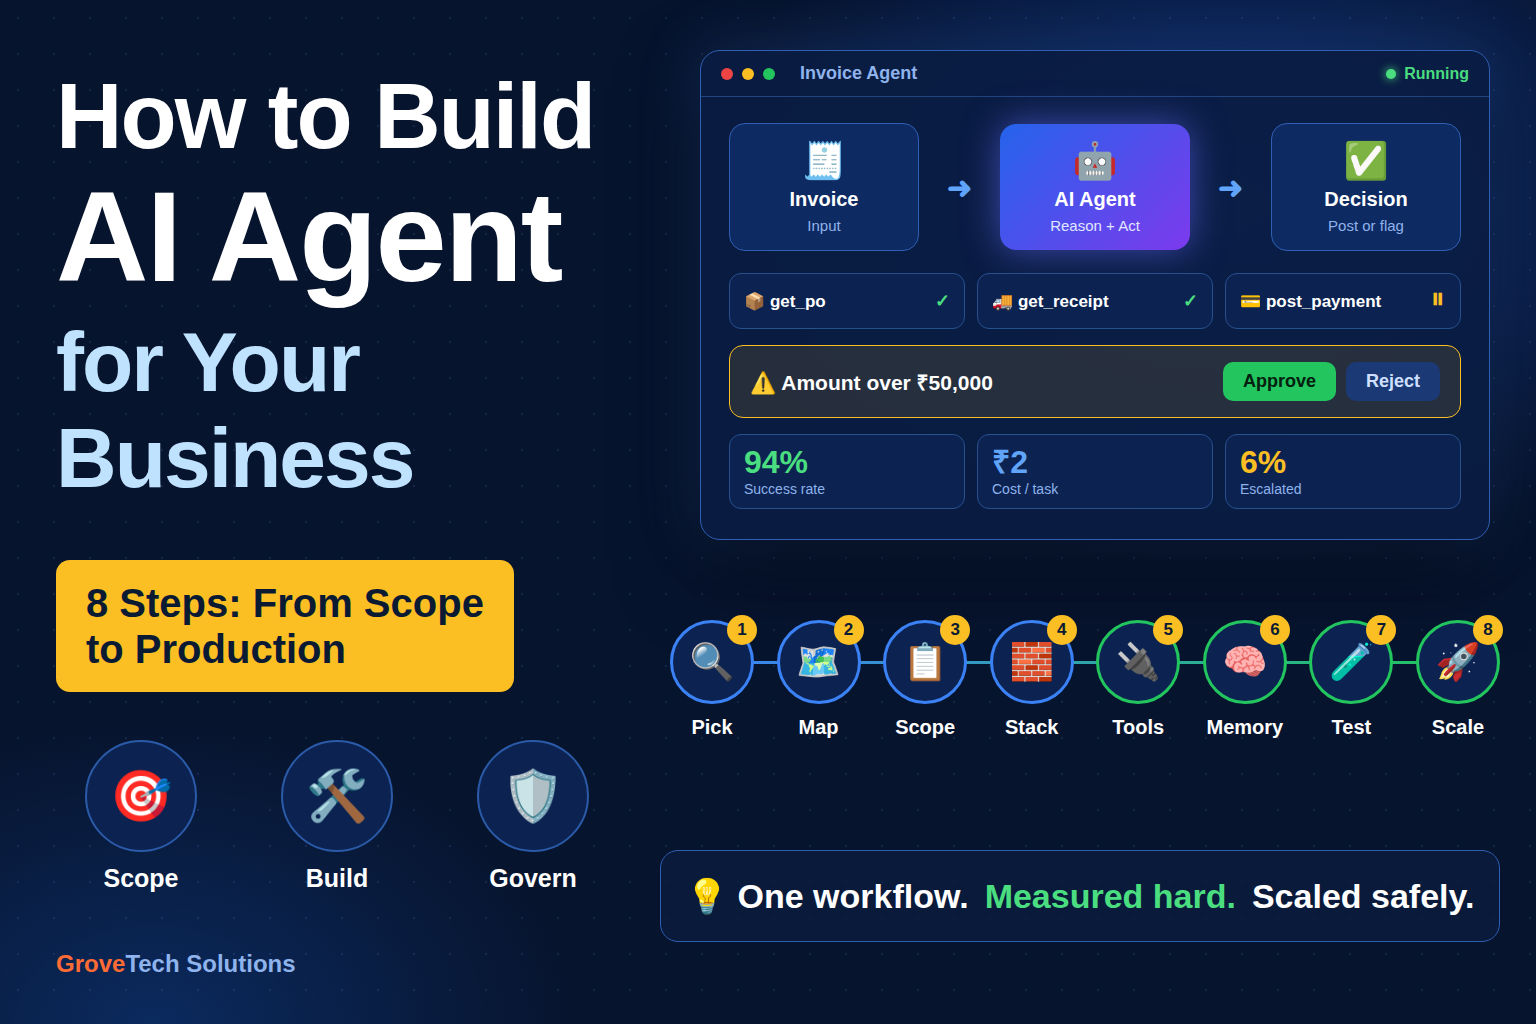
- 01Step 1: Choose the Right Workflow
- 02Step 2: Map the Human Process First
- 03Step 3: Define Goal, Scope and Guardrails
- 04Step 4: Select Your Technology Stack
- 05Step 5: Build the Integration Layer
- 06Step 6: Add Memory and Context
- 07Step 7: Evaluate Before You Deploy
- 08Step 8: Deploy, Monitor and Scale
- 09Build In-House, Buy, or Partner?
- 10Five Mistakes to Avoid
- 11Conclusion
Most failed AI agent projects don't fail at the model. They fail at the scope.
A team picks an ambitious, ambiguous process - "automate customer service" - hands it to an LLM with a dozen tools, and watches it produce impressive demos and unusable production behaviour. Meanwhile, the teams that succeed pick something almost boringly narrow: match invoices to purchase orders, triage inbound tickets, enrich new CRM leads. They ship in two months, prove the number, and expand from there.
This guide walks through the build process we use at GroveTech Solutions - the same sequence behind agent deployments in finance, logistics and e-commerce. If you're still deciding whether you need an agent at all, start with our breakdown of AI agents vs chatbots first, then come back here.
Step 1: Choose the Right Workflow
The single highest-leverage decision in the entire project. Score candidate workflows against five criteria:
- Volume - does it happen at least 50 times a week? Low-frequency work rarely justifies the build.
- Repeatability - can a competent new hire learn it from a document?
- Digital inputs - is the data already in systems, or trapped in someone's head?
- Clear success definition - can you tell, objectively, whether the task was done correctly?
- Tolerable failure cost - what happens if the agent gets it wrong once in a hundred runs?
Strong first candidates: invoice reconciliation, lead research and CRM enrichment, document classification, order exception handling, alert triage, first-draft report generation. You can see how these play out in practice in our roundup of AI agent use cases that deliver ROI.
Weak first candidates: anything requiring negotiation, relationship judgment, legal interpretation, or access to knowledge that lives only in tribal memory.
Step 2: Map the Human Process First
Before writing a line of code, sit with the person who does the job and document every step: what they open, what they check, what they decide, and - crucially - what they do when something looks wrong.
That last part is where projects live or die. The happy path is easy. The exceptions are the product. Capture:
- Every decision point and the rule behind it
- Every system touched and how they authenticate
- Every escalation trigger ("if the amount is over ₹50,000, I ask my manager")
- Rough time spent per step, to build your ROI baseline
You'll usually discover the process isn't documented anywhere, and that two people do it differently. Resolving that ambiguity before automation is half the value of the exercise.
Step 3: Define Goal, Scope and Guardrails
Write a one-page agent specification covering four things:
- Objective - a single sentence: "Given an incoming supplier invoice, verify it against the matching purchase order and goods receipt, then either post it for payment or flag the discrepancy."
- In-scope / out-of-scope - explicit boundaries. What the agent must never attempt.
- Permissions - least-privilege credentials for every system. Read-only wherever possible; write access only where required and logged.
- Escalation rules - thresholds, confidence floors, and irreversible actions that always require human approval. Payments, deletions, external communications and legal commitments belong behind an approval gate on day one.
This document becomes both your engineering brief and your governance artefact.
Step 4: Select Your Technology Stack
There are five layers to choose, and the right answer depends on your constraints - not on what's trending.
- Reasoning model. Frontier models (Claude, GPT, Gemini) for complex planning and nuanced judgment; smaller or open-weight models for high-volume classification and extraction where cost per call dominates. Most production agents use a mix, routing simple steps to cheap models.
- Orchestration framework. LangGraph and CrewAI for code-first control; n8n or similar for visual workflow-based agents that non-engineers can maintain. We compare the orchestration patterns in detail in our AI workflow automation guide.
- Memory. A vector store (Pinecone, Weaviate, pgvector) for long-term retrieval, plus structured storage for run history and decisions.
- Tool layer. REST APIs, database connectors, MCP servers, browser automation where no API exists.
- Observability. Tracing, token accounting, latency and failure dashboards. Non-negotiable - you cannot debug an agent you can't see.
If your data foundations are shaky, fix them first; agents amplify data quality problems. That's typically a data engineering and analytics engagement before the agent work begins.
Step 5: Build the Integration Layer
This is where the majority of engineering hours actually go - not prompt writing.
Each tool the agent uses needs a clean, well-described interface: a precise name, a clear description of when to use it, typed parameters, and predictable error handling. Vague tool descriptions are the most common cause of erratic agent behaviour.
Practical rules that save weeks:
- Make tools idempotent so retries don't double-charge or double-post.
- Return structured errors, not stack traces - the agent has to reason about failure.
- Keep tools narrow:
get_invoice_by_idbeats a general-purposequery_database. - Add rate limiting and timeouts at the tool boundary, not in the prompt.
Legacy systems without APIs are the usual blocker. Wrapping them in a service layer often turns into a legacy modernization or custom software development workstream running in parallel.
Step 6: Add Memory and Context
An agent with no memory repeats mistakes and asks for information it already had.
Design three tiers:
- Working memory - the current task's state, kept in context.
- Episodic memory - past runs, decisions and outcomes, retrievable by similarity.
- Semantic memory - your policies, product catalogue, SOPs and reference documents, retrieved via RAG.
Be deliberate about context budget. Stuffing everything into the prompt is expensive and degrades reasoning quality. Retrieve narrowly, summarise aggressively, and log what was retrieved so failures are explainable.
Step 7: Evaluate Before You Deploy
Demos prove nothing. Build an evaluation harness before production.
Assemble a golden dataset of 50-200 real historical cases with known correct outcomes - including the messy ones, the exceptions and the edge cases your expert described in Step 2. Then measure:
- Task success rate against ground truth
- Tool-call accuracy - right tool, right parameters
- Escalation precision - does it hand off when it should?
- Cost and latency per run
- Regression - re-run the suite after every prompt or model change
Set a deployment threshold in advance. If the agent doesn't clear it, you iterate - you don't ship and hope.
Step 8: Deploy, Monitor and Scale
Roll out in stages: shadow mode (agent runs, human decides), then human-approval mode, then autonomous with sampling. Each stage builds evidence and trust.
In production, watch cost per task, success rate drift, escalation volume and tool failure rates. Model providers update; your data changes; performance moves. Treat the agent as a living system with an owner, not a finished project - the same discipline you'd apply through a DevOps and CI/CD pipeline.
Once the first agent is stable and the numbers hold, expand: adjacent workflows, then multi-agent systems where one agent's output triggers another.
Build In-House, Buy, or Partner?
- Buy a platform if your use case is standard (support deflection, meeting notes, sales outreach) and your data isn't unusual. Fastest, least control.
- Build in-house if agents are core to your product and you already employ ML and platform engineers. Highest control, highest cost, slowest start.
- Partner if you need production-grade agents in a quarter without hiring a team - typically starting as a scoped MVP build on one workflow, with knowledge transfer so your team can own it later. See how these engagements land in our portfolio and across the industries we serve.
Five Mistakes to Avoid
- Starting too broad. One workflow, one owner, one metric.
- Skipping evaluation. Without a golden dataset you're guessing.
- Giving write access on day one. Earn autonomy in stages.
- Ignoring unit economics. Track cost per task from the first run.
- No human owner. Every agent needs someone accountable for its output.
Conclusion
Building an AI agent is less an AI problem than a systems problem. The model is the easy part; the work is in scoping honestly, integrating cleanly, testing rigorously and governing carefully. For a primer on the underlying concepts, see our explainer on agentic AI.
Pick the one workflow where your team currently copies data between two screens. Map it. Scope it. Build it narrow, measure it hard, and expand only once the number is real.
Want help scoping your first agent? Book a free consultation with our AI engineering team, explore our AI integration and consulting services, or browse more implementation guides on the GroveTech blog.
Frequently Asked Questions
Common questions about How to Build an AI Agent for Your Business
A focused single-workflow agent typically takes 6-12 weeks end to end: 1-2 weeks of discovery and process mapping, 4-6 weeks of build and integration, and 2-3 weeks of evaluation and staged rollout. Multi-agent enterprise systems take longer, mostly due to legacy integration.
Costs split into build effort and running cost. A scoped pilot is usually a fixed engagement; ongoing cost is driven by tokens per run, tool calls and infrastructure. Optimised agents typically run a few cents to a few rupees per task, which is why cost per task should be tracked from day one.
Not necessarily. Modern agents are built primarily with software engineering skills - API integration, orchestration, testing and observability. ML expertise helps with evaluation design, retrieval tuning and model selection, but you rarely need to train a model from scratch.
There's no universal best. LangGraph suits code-first teams needing fine-grained control over state and branching; CrewAI suits multi-agent role delegation; n8n suits visual, maintainable workflow automation. Choose based on who will maintain it after launch.
Layer defences: narrow tool scopes, least-privilege credentials, structured outputs with validation, confidence thresholds, human approval gates for irreversible actions, and full audit logging. Then test against a golden dataset before every release.
Yes, though it usually requires an integration layer. Where no API exists, options include building a service wrapper, database-level access, or browser automation as a last resort. Legacy integration is often the largest engineering line item.
Clean access to the systems the workflow touches, your policies and SOPs for retrieval grounding, and historical examples of completed tasks for evaluation. You don't need a training dataset - you need a test dataset.
Baseline the human time and error rate per task before you build, then compare against agent throughput, success rate, escalation rate and cost per run after deployment. Include the time saved on rework, not just the primary task.
Rarely at launch. Start in shadow mode, move to human approval, then grant autonomy on the task types that have proven reliable. Keep irreversible actions gated permanently.
Traditional automation follows fixed rules and breaks on anything unexpected. An AI agent reasons about the situation, chooses its own sequence of steps, and adapts when conditions change - at the cost of needing stronger guardrails and evaluation.
Sharad Patel
Software Engineer · GroveTech Solutions
A member of the GroveTech Solutions engineering team, passionate about building great software and sharing knowledge with the developer community.
Our Services


